Pillars of Garendall
Walkthrough and Compendium
Below is a walkthrough for all the quests contained within the standard version of POG, as well as a compendium of where to find important people, locations, and where to find hidden treasures. It also lists the secrets and easter eggs that can be found within POG.
Table of Contents:
Missions and Quests
Important People
Miscellaneous Items
Bestiary
Secrets
Locations
Plug-in Information
Troubleshooting
Links to other PoG pages
The Learning Tree missions:
- Beginning the quest
- Recovering the stolen book
- Completing the construction of the Tearos bridge
- Locating the Order of the Seasons
- Finding the Black Tooth
- Recovering the Milla'kara shield
- Locate and recover the evil ring
- Retrieve the Tome of Elixirs
- Pick wild herbs part I
- Fisherman's "sea goddess" statue
- Pick wild herbs part II
- Re-forge the Milla'Kara shield
- Confront the Guardian
- Awake the slumbering giant
- Beginning the quest
- Rescuing someone in need
- Rescuing the general from Ghost Swamp
- Warning the garrisons
- Warning the garrisons - Dernath Garrison part I
- Ending the terror of the Cyclops
- Warning the garrisons - Dernath Garrison part II
- Warning the garrisons - Berglum Garrison
- Recovering the Symbol of Garendall
- Beginning the quest
- Clearing the road of kobolds
- Finding the harp
- Locating Mesera's cave
- Finding Mesera - the two possible outcomes
The Cyclops Eye mission:
Important People:
- Queen's Brother
- Emilius, the Druid
- Mary Kristina
- Orobas, Elf of the Order of Seasons
- Kalixa, the Witch
- The Blacksmith near Gidolan Keep
- Karax, wielder of the Runic Sword
- The tent of Decimus
- The divine lamp
- The diadem of stone
- The war-axe of misery
- The dwarven runic sword
- The elven bow of destruction
- The full elven plate
- The lilith shield
- The ring of the titan
- The ring of the unicorn
- The ring of the gods
- The minotaur scythe
- The ogre axe
- The dagger of ferret
- Seashells
- Azarath
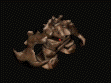
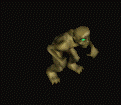
- Boulder
- Cyclops
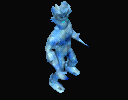
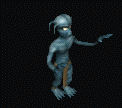
- Dark Fairy
- Dark Spirit
- DeathKnight
- Earth Elemental
- Forest Ogre
- Ghoul
- Ghoul - Master
- Goblin
- Goblin - Javelin thrower
- Guardian
- Ice Elemental
- Ice Imp
- Jellytor
- Kobold
- Kobold - Demonic
- Lilith
- Mage - Archmage
- Mage - Rogue
- Mage - Wild
- Manticore
- Medusa
- Mindhunter
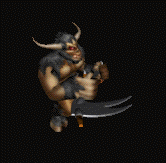
- Minotaur
- Minotaur - White
- Molespider
- Mushooze
- Ookwasp
- Ookwasp - Killers
- Rock Imp
- Rocky Spider
- Sea Giant
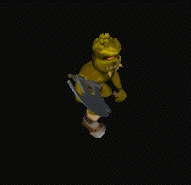
- Semenon
- Semenon - Master
- Stone Giant
- Termite - White
- Termite - Red
- Thief - Brown robe
- Thief - Blue robe
- Thief - Red robe
- Thivuk
- Troll
- Wyrm
- Zombie
- Zombie - Revenant
- The Blue Mushroom
- Awakening the Spirit of Nature
- Swimming at the Pink Termite
- Opening All of the Termite Tunnels
- Buying a Termite
- Elven Bed
- Lilith Shrine
- The Learning Tree
- Gwyden Camp
- Berglum
- Dernath
- Plains of the Endless Winds
- Wyrm Valley
- Witch Finger
- High Garendall
- Reef's Island
- The Old Dwarf
- Fungus's Getaway
- The Fantrima Tunnel Entrance
- The Learning Tree Tunnel Entrance
- The Gwyden Camp Tunnel Entrance
- The Berglum Tunnel Entrance
- The Dernath Tunnel Entrance
- The Plains of Endless Winds Tunnel Entrance
- The Witches Finger Tunnel Entrance
- The North Gidolan Tunnel Entrance
- The South Coast Tunnel Entrance
- The Cyclops Tunnel Entrance
- The Wyrm Valley Tunnel Entrance
- The Northern Territories Tunnel Entrance
Troubleshooting:
- What is the most current version of PoG?
- I get an error when unstuffing PoG or various plug-ins
- I get an error about Internet Config
- The Mac PoG demo quits to the Finder as soon as it opens
- I get an error about "dsound.dll:ll" when I run PoG for Windows
- The Trinity plug-in doesn't load
- Trinity loads, but there are no people in the new locations
- I have a dual processor and PoG crashes or has other problems
- PoG won't save my game under OS X Jaguar
The Learning Tree missions:
This is the central quest to the game, and the most important. This is the only quest that absolutely has to be finished in order to "win" the game. It is the longest and most in-depth, and will send you to all corners of the Kingdom of Garendall. The missions are progressively difficult so that you can begin the quest as a new character and expect that as you complete the various missions your character will be rising in levels and strength at a fairly close pace.Beginning the quest: The mission sequence for the learning tree starts within the village of Fantrima. The Queen's brother is the mayor of the town and you start the game being asked to find him and ask him for help. He can be found wandering around near a well at the southwest portion of town, and is identified as a portly fellow. He will offer no help but instead send you to see the Druid Emelius at the Learning Tree.
Recovering the stolen book: When you arrive at the Learning Tree Emelius will not aid you right away. Instead he seeks for you to prove yourself, and so he sends you on a mission to rescue a book that has been stolen from him. A child in Fantrima knows where the bandits are camped with the book if you choose to start questioning people. Otherwise you should travel down to Fantrima, and then head 2 screens south and then 1 west. Cross the bridge and follow the river towards the west edge of the screen. You will find the bandits in blue robes, and their leader in red. After killing the blue bandits the leader will offer you a deal: he will sell you the book for 50 gold, or you can fight it out and winner take all. It really makes no difference what you choose(aside from a different ending to a later quest), but just remember the old adage, “Violence only begets more violence.” (But we like violence, right?) After securing the book head on back to Emelius and present it to him.
Completing the construction of the Tearos bridge: Emelius will be pleased that you recovered the book and send you to Gwyden find out why the bridge over the Tearos river has not been completed. Upon arriving in the camp you learn that Ookwasps have forced the workers to cease working. They need you to get rid of them, so off you go! The bridge is located by following the road west out of Gwyden camp 1 west, 1 north, and 1 more west. The Ookwasps are on the same screen as the bridge and differ from “normal” ookwasps by being slightly larger and a bluish color. Kill all 10 of them and then return to Gwyden Camp and speak with the foreman. He should inform you that they will commence working immediately, and that you should return to Emelius. Go ahead and return to the druid.
Locating the Order of the Seasons: Emelius again is pleased and should now have granted you access to level 2 of the learning tree. He also has told you that the tree has orders for you. Enter the learning tree and do a search on level 1 for “Orders.” After learning about the order of seasons head up to level 2 and do a search on “Order of Seasons.” You should now have a quest to find this lost order. Head to the ruins within the plains of endless winds(from the Tearos Bridge head 1 screen west, and 3 screens south). In the northern section of this map you will find a cave. Enter the cave and fight your way to the bottom and you will find an Elf named Orobas, who is the last member of the Order of the Seasons. Solicit his aid and he will first ask you to prove yourself by finding the black tooth.
Finding the Black Tooth: Orobas will have activated a teleport pad which will teleport you out of his cave to the ruins(and back again!). Your quest for the tooth lies in the temple of the Order of the Crystal. To get there you will need to cross Verandeep Lake. Head 1 screen south and then 1 screen west. Locate a cave at the center of the screen and enter it. Fight your way to the southern end and exit the cave. You will now be on the south side of Verandeep Lake! From here head 1 screen west and 1 screen south and you will find a large skull temple: the order of the crystal! Enter the temple and you will find a maze of walkways. Navigate around until you find a stairway down. Go down and search for a secret passageway on the eastern cave wall. Go through the passageway and you will find the missing black tooth! Take this and return to Orobas.
Recovering the Milla'kara shield: Orobos will be suitably impressed when you return with the tooth, and he will give you some more background of what has happened. He will send you out to find the Milla'kara shield, saying that you should talk with a smith somewhere about it. If you travel to Fantrima the smith there not only has heard of it, but has heard that it was last seen on the Witches Finger. Hmmm. Travelling to the Witches Finger sounds like the thing to do. To get there from the Plains of Endless Winds Tunnel Entrance head 1 screen south and then 3 screens west. You will find a cave on the west edge of the screen that is filled with manticores. Enter the cave and fight your way across the bridge. Do not go through the exit on the southwest side of this cave, but instead go 1 screen south. Fight your way south and find the exit on the southeast side of the cave. Leave the cave through this exit and you will find yourself on the Witches Finger near Kalixa the Witch. Go talk with her and you will see in her dialog box an entry asking if you would like to buy the Milla'kara shield from her for 3,000 gold(NOTE: this is a dialog box, not a part of her shop inventory). Purchase the shield from her and return to Orobas.
Locate and recover the evil ring: Upon bringing Orobas the shield he will ask that you recover the Tome of Elixirs from High Garendall. The only problem is that High Garendall is inaccessible to you at the moment. Sounds like a problem. But Emelius the druid asked you to find something that could save Garendall, and you have the Milla'kara shield. So go back to Emelius and show it to him. When you do this he will apologize to you and then send you to find an evil ring for him. The ring is within the bleeding forest, which lies 2 screens east from the southern Verandeep Lake entrance cave. At the southeast corner of the map is a well that contains the ring. Get it and go back to Emelius.
Retrieve the Tome of Elixirs: Emelius will now grant you access to the 3rd and final level of the learning tree. Go up to the top and claim the key that is up there and which will unlock the path to High Garendall. Leave the learning tree and head for High Garendall: Go to the Tearos Bridge and then head 1 screen west and 4 screens north. You will find a temple surrounded by dark spirits. Enter it and fight your way to the exit of the eastern side and leave the temple. (NOTE: When you leave the temple do not enter the cave on the northwest side of the screen. That is not the way to High Garendall!) Once you are outside the temple head 1 screen east (and you will see an animation of the slumbering giant) and 1 screen north. You should now be within the ruined city of High Garendall. There is a cave on one of the eastern cliff faces. Enter the cave and find the stairs down. On the northeastern side of the 2nd level you will find a circle of pillars and the Tome of Elixirs is within it. Take it and return to Orobas.
Pick wild herbs part I: Orobas will ask one more boon of you, that you find some magical herbs for him. But where would they be? As the answer to any question seems to be found in the book in the Learning Tree, you will need to head there first. On the third level of the tree ask the book about "Magical herbs." It will tell you about a place called "Reef's Island." Ask it about that and it will tell you that you need a boat to get there. Travel to Berglum and speak to the man on the docks. Ask him about taking you to Reef's Island. He sends you on a short mission to recover a stolen statue.
Fisherman's "sea goddess" statue: There are some people in Berglum who know the whereabouts of the brigands who stole the statue. If you ask around you will find some clues. Otherwise travel 1 screen south of the Berglum entrance and you will find a group of mages around a fire. The last mage you kill will drop the statue. Take it back to the man on the docks and he will agree to sail you to Reef's Island.
Pick wild herbs part II: From where you are deposited on Reef's Island head 1 screen east, 1 screen south, and then 1 screen west. In roughly the center of the map you will find a cave. Enter it and fight your way to the very bottom and you will find a serene little place filled with plants and a small pond. On the western bank of the pond the magical herbs are growing. Harvest them and make your way back to Orobas.
Re-forge the Milla'Kara shield: Orobas takes the herbs and sends you to find the "greatest blacksmith" ever to re-forge the Milla'Kara shield. The dwarf lives south of Gidolan Keep, which is sea-giant territory, so caution is advised. One of the easier routes to the dwarf is as follows: From Fantrima go 2 screens south and 1 west. Cross the river via the bridge so that you are on the south side of the river on the same screen, then head 1 screen east. About midway down the screen the forest on the eastern edge opens up. Head through this opening and follow as it winds to the south. Head 3 screens south, then 1 screen west. Cross the bridge and look for the dwarf on the south edge of this map. Ask him to re-forge the shield and he will do so and return it to you “good as new.” Take the shield back to Orobas.
Confront the Guardian: Orobas will give to you an emblem which will unlock the gate to where the Guardian awaits when you return to him with the shield. Head back to the temple which allows access to High Garendall and when you exit it this time enter the cave on the northwest side of the map(the one I told you not to enter before). Fight your way down to the bottom and you will find a large gate. (NOTE: Save your game at the gate. Once you enter you will be unable to leave if you ever choose to play other plug-ins or do some other exploring) Touch the gate and the emblem Orobas gave you will allow you to open it. The chamber beyond has the guardian inside it. Fight him, kill him, and the ground opens up leading down to the level below. (NOTE: Do not save your game in the chamber where you killed the guardian. If you reload your game in this chamber after the guardian has died the exit will not be loaded and thus there will be no way out)
Tips on killing the Guardian: The guardian wants to fight you by running in close and slashing you, then running away and cooking you with lightning blasts. The lightning is by far the worst of the two, especially since you have a chance of blocking his slashes. The key to defeating the guardian is staying close to him and blocking when he attacks then counter attack. It is best to use a hard hitting weapon(either the Great War Axe of Misery or the dwarven runic sword and a shield), as this will reduce the amount of time it will take to kill him(and thus give him less time to kill you). Have an ample supply of healing potions(the ones that give 300 health), since these will give you back 100 hitpoints per "tick" and you will be able to sustain a couple blows from the guardian during your recharge and still be fully healthy. Keep hacking at him and following him as he retreats. Do not let him get distance between you, else he will call down lightning and fry you. Good luck.
Awake the slumbering giant: Go down the hole and walk up to the giant's toe. Use the shield and watch the animation. Answer the questions however you want to, and watch the end sequence.
Congratulations, you have finished the game!
The Knight's missions:
While not necessary to complete the game, this quest is a very beneficial one for the hero. By taking on this quest the hero will advance through the stages of Knighthood(Page, Squire, Knight), and at each stage will become a better warrior(improved stats: speed, strength, dexterity, vitality). The quicker these missions are completed the better the hero will become overall.Beginning the quest: This quest begins by locating Septembris, the commander of the Fantrima army. He is located 1 screen south of Fantrima by his house, which is on the southern edge of the map near the center of the east-west horizontal. His house is easily identifiable(besides being the only house on the map) by the bright red pendants being flown.
Rescuing someone in need: Septembris tests your worthiness for training by having you rescue "someone in need," as if rescuing the entire kingdom isn't worthy enough. Septembris looks fairly old and set in his ways, so we need to humor him. In Fantrima there is a woman just northeast of the herbalist. If you speak to her she will tell you that her son is missing and that he was playing in the forest just to the west of Fantrima. Travel 1 screen west from Fantrima and a window should pop up saying you hear someone crying for help. Go to the middle of the far west side of the screen and you will find a large bonfire with goblins holding a little boy next to it(Yum yum, roasted boy!). Kill the goblins and speak to the boy who will run home. Go speak with his mother who will thank you, and then return to Septembris who will promote you to Page and send you on the next stage of your quest.
Rescuing the general from Ghost Swamp: Septembris's greatest general, Decimus, disappeared in the Ghost Swamp some time back, and he wants him back. So you need to travel to the Ghost Swamp and free him. From Septembris's house travel 4 screens north and then 1 screen east. You will be on the same screen as the Learning Tree. Head east another 2 screens, and then north 1 screen and you will be in the Ghost swamp. The cave you are looking for is 1 more screen east and is located slightly west of the center of the map. Enter the cave and fight your way to the very bottom. You will find a death knight(big skeletal guy with a flaming red sword) here. Kill him. As he dies a crown will fall and be put into your inventory. Do not drop the crown or this mission becomes unfinishable and you will never be able to attain knighthood! Decimus will appear and you both will be teleported out of the cave, and then he will leave and go to Septembris. Make your own way back to Septembris and he will promote you to Squire and send you on the next stage of your quest.
Warning the garrisons: The Queen asked you to warn the garrisons and Septembris wants you not only to do this but to also ask them to send soldiers to the barricades. However before you begin this quest speak with Decimus, the general you rescued from Ghost Swamp previously. He will thank you for rescuing him, but also ask you to speak to the garrisons using his name. You can not complete these quests before you do this. Once you have spoken with the general you can warn the garrisons.
NOTE: After successfully warning both garrisons talk with Decimus again and he will give you his tent.
Warning the garrisons - Dernath Garrison part I: It does not matter which garrison you wish to warn first, this one or the one in Berglum. The Dernath garrison is located in Dernath. The village however is under the threat of cyclops raids, and is not about to send any of their able-bodied men to the barricade while their village is in peril(it would be too perilous). Speak with the garrison commander(he is on the western edge of the village) and he will tell you about the raids. Speak with the mayor and offer to end the cyclops problem. He will thank you and send you off to save the village.
Ending the terror of the Cyclops: You need to travel to where the cyclops live in order to end their raiding. From Dernath village you need to travel 4 screens north and then 1 screen east and you will find several soldiers standing around a fire guarding a barricade. Speak to the soldiers and they will let you through the blockade if you spoke first with the mayor of Dernath. Pass through the blockade and travel 1 screen east and 1 screen south. You will find all 10 cyclops on this screen. When you kill the final cyclops an iron key will drop allowing you to open the chests at the bottom of this screen.
Warning the garrisons - Dernath Garrison part II: After killing all 10 cyclops return to the blockade and speak with one of the soldiers. The soldiers will send a man back to the village and spread the word of your deed. Return to Dernath and speak with the mayor. He will thank you and end the cyclops threat portion of this quest. Then you can speak with the garrison commander and using Decimus's name he will agree to send men to the blockade. If you haven't warned the Berglum garrison yet do so, else head back to Septembris.
Warning the garrisons - Berglum Garrison: The Berglum garrison is located in the large village of Berglum. The garrison is in the eastern half of the village and located near the eastern wall. It is identifiable by the red pendants mounted on flag poles in front of the building. The Berglum garrison commander is an arrogant S.O.B., but then I can't really blame him for not automatically trusting an adventurer with a mullet crying about fantasy creatures trying to destroy the world and the only salvation for the kingdom is for the commander to reduce the size of his garrison. Yeah, I'd say our hero is lucky not to have his next quest be titled, "Escape from Berglum Dungeon." Anyhow upon first speaking with the commander he laughs you off. After you have spoken with Decimus however and speak in his name then the commander takes you seriously and agrees to send troops down to the barricade. If you haven't warned the Dernath garrison yet do so, else return to Septembris.
Recovering the Symbol of Garendall: The symbol of High Garendall is a standard, and it is located in High Garendall. Unfortunately, if you have not yet completed the Learning Tree missions up through the evil ring portion, then you will need to do this before you can access High Garendall and thus complete this portion of the quest. When you have access to High Garendall go there and travel 1 screen west to the western half of the ruins. There will be a cave entrance on the western edge of the map, and slightly south of this cave(not in the cave) on the map the banner will be lying on the ground. Grab it and return to Septembris. When you give it to Septembris he will congratulate you and give you the title of "Knight."
Congratulations, you have completed the Knight's mission!
In the Path of Thievery missions:
This is a very nice side quest that will allow the hero to gain 2 very useful skills: Pathfinding(makes hidden paths through forests or caves visible by placing a white S within a white circle in front of the path) and Awareness(allows you to see how many npcs, both aggressive and passive, are on a map by using the map overhead view. It will only show npcs that are in an area you have explored however, as it will not penetrate the "fog of war"). None of the missions in this quest are particularly difficult, but they are spread across the kingdom and may require some time before you are able to complete them all.Beginning the quest: This quest begins when you first speak with Mary Kristina, a woman found in Fantrima northeast of the inn. She asks that you clear the road near Gwyden Camp of kobolds so that it will be safe for her husband to return home.
Clearing the road of kobolds: In order to clear the road of the kobolds you must first find them. From Fantrima you should travel 3 screens north and 1 screen east and you will be on the same screen as the Learning Tree. From there continue on by heading 1 screen north and 1 screen east. Follow the road as it curves northward and then back west on the same screen, and follow the northern bend of the road 1 screen west and then 1 screen north. You are now on the first of 2 screens that the kobolds are spread out across. The kobolds for this mission are special in that they have red eyes. Kill every red-eyed kobold that you can find, then travel 1 screen east and again locate and kill every red-eyed kobold that you can find. When you have killed them all follow the road 1 screen north on into Gwyden Camp. Find Mary Kristina's husband walking around on the eastern portion of the encampment and tell him that the road is clear(if he says it isn't cleared then go back to the 2 screens(1 south and 1 south, 1 west of Gwyden Camp). He will thank you and then disappear. Return to Fantrima and talk with Mary Kristina again.
Finding the harp: Mary Kristina says she will teach you a trick if you will go and retrieve her harp that her father hid in a cave(and a trick from Mary is always worth the risk). Travel 2 screens north from Fantrima and cross the bridge that spans the gorge. A small ways north of the bridge on the same screen is a sign post. Stand your character just south of the sign post(so that you are close enough to read it) and walk directly west towards the forest. There is a secret path through the trees that make it appear like your character is walking through the trees. At the end of the path is a cave. Enter the cave and fight your way through boulders and jellytors to Mary Kristina's harp(it is southwest of the center of the cave). Take it and return to Fantrima and speak with Mary Kristina. She will teach you the Pathfinding skill and point you in the direction to learn more thieving skills.
Locating Mesera's cave: Mary Kristina told you that Mesera lives in Perugo forest, which just happens to be a decently large area. To get to the cave where he resides, first travel from Fantrima to Gwyden Camp. From there follow the road 1 screen west, 1 screen north, and 1 screen west to the bridge over the Tearos river. If the bridge has not been built yet there is a quest that you should complete first. Cross the bridge and travel 2 screens west and then 4 screens south. In the center of the map you will find a cave. Enter the cave and fight your way south to the exit. Once you have exited the cave travel 4 screens south(an item of note is that on this screen the North Gidolan tunnel entrance is located just north of the center of the map, and is worth stopping at to open it up for later use). Travel 1 screen east and you will locate the cave on the southeast side of the map. Enter the cave and look for Mesera.
Finding Mesera - the two possible outcomes: Mesera is located in a sealed off portion of the temple in the southeast section. You will find a closed gate set in a north wall at the end of an east running corridor that will not open. However if you backtrack west a short ways until you find a corridor running south and follow that passageway south it will open up into a large chamber. In this chamber you will find 2 "buttons," which are tiles that have a small circle on them set into the floor. Walk over these and they will depress and you will hear a faint "click." When you have tripped both of these buttons return to the gate and it will be open. Enter through the gate and you will be greeted by 1 of 2 possible outcomes depending on what you did back in the first of the Learning Tree missions. If you let the bandit leader live then Mesera will teach you the Awareness skill. If you did not then you will have to fight and kill Mesera, find the scroll kept in the chest in the northern part of Mesera's chamber, and then take the scroll back to Mary Kristina so that she can teach you the Awareness skill. Either way as soon as you deal with Mesera you will learn the Awareness skill one way or the other, and the Path of Thievery quest will be concluded.
Congratulations, you have completed the In the Path of Thievery mission!
The Dark Fairy missions:
A simple and quick quest that nets the hero a very nice hat which protects against Mind Control attacks(useful against mindhunters and medusas).Locating Heldan: Heldan can be found in the village of Berglum . In the western half of the village he can be found on the west bank of the river north of the bridge that crosses it. He looks like a befuddled man wearing a copper beanie. When you speak with him he seems crazy and asks that you capture a dark fairy for him. If you agree he gives you a cage and sends you on your way.
Capturing the dark fairy: If you do not yet have the Awareness Skill you need to complete the quest In the Path of Thievery first, as this skill is required for completion of the dark fairy quest. If you have the skill then from the Wyrm Valley tunnel entrance travel 1 screen north. When you enter this screen a message should pop up stating that the fairy is taunting you. Run around the screen until you find the fairy and then kill it(it won't really die, when you "kill" it you will get a message saying you throw it into your cage and lock the door). Return to Heldan and he will give you his hat in trade.
Congratulations, you have completed the Dark Fairy mission!
The Cyclops Eye mission: This is a very small quest with a nice payoff to make it worth it in the form of a couple of stat-boosting potions. There isn't much work to do and if you are in the process of doing the Dernath garrison missions for the Knight's missions, it would be well worth it to take on this mission also.Beginning the quest: This quest begins in the village of Dernath. There is an old man in the southern portion of the village living by himself. He is identifiable by his long white beard and walking cane. He will ask that you bring him back an eye from a cyclops for his potions.
Locating a cyclops: If you agree to bring the old man an eye from a cyclops you will need to locate a cyclops and then kill it(you didn't really think a cyclops would just hand its eye over if you asked it, did you?). Cyclops can be found in 2 primary locations. First if you haven't yet completed the mission to exterminate the cyclops in order to save the village of Dernath then there will be cyclops in that region. If you have already completed that mission or do not wish to travel there then you will be able to find cyclops around the Cyclops tunnel entrance. Once you have found and killed a cyclops an eye will be added to your inventory. Take this back to the old man and he will give you the potions he promised.
Congratulations, you have completed the Cyclops Eye mission!
Important People:
This is a compilation of the various citizens of Garendall that do more than add flavor to the kingdom, but who also either send the Hero on quests and missions, or give the Hero important items.|
Queen's Brother: The Queen's brother is the Mayor of Fantrima. He can be found just to the southwest
of the center of town, pacing back and forth in front of a fountain. He will refuse to aid in your quest, but
will send you on a mission to locate Emilius, the Druid. |
|
|
Emelius, the Druid: The druid can be found at the Learning Tree, where he
lives his life tending and protecting this sacred tree. The druid will enlist the hero in a series of
quests in an effort to save the kingdom from destruction. |
|
|
Mary Kristina: This woman lives in Fantrima, and can be found to the northeast of the center
of town pacing outside of her house. Her husband is trapped at Gwyden Camp and
will send the hero on a quest to rescue him. This is the beginning of the
Path of Thievery mission. |
|
|
Orobas, Elf of the Order of Seasons: Orobas is the oldest living person known to exist in Garendall.
He was living when the stone giants that were created to protect High Garendall were made, and it is his
aid that is needed to awaken them. Orobas is the person that the Learning Tree sends
you to find during the Order of Seasons mission. |
|
|
Kalixa, the Witch: Kalixa lives at the very end of the western penninsula known as the
Witches Finger. She sells powerful equipment plus skill potions, and
has the Milla'Kara shield. |
|
 |
The Blacksmith near Gidolan Keep: This dwarf lives in a small house in the middle of Sea Giant
territory. He is reputed to be one of the greatest living smiths, and is the only one able to complete
the quest to reforge the Milla'Kara shield. |
 |
Karax, wielder of the Runic Sword: Karax is a dwarven merchant who is attempting to get to
Berglum. Unfortunately his wagon has broken and he is stuck. If taunted he will
challenge the hero to a duel, and if defeated he will give up his runic sword. |
Miscellaneous items:
Here is a list of items and their locations that do not have quests to claim them, but are potent enough to mention and may be worthwhile the time and trouble to go after them.The Tent of Decimus: Arguably the most important item in the game, the tent of Decimus allows the hero to rest when no enemies are present on the screen and thus regain all lost stamina points. This makes staying at an inn an act of charity, and purchasing healing potions less necessary(you will only need them during combat or when clearing a screen of enemies is impossible). This tent can be had through the Knight's Missions after completing the quest to warn the garrisons. Once this quest has been completed speak with Decimus(located 1 screen south of Fantrima) who will be next to a tent just northwest of the center of the screen. He will thank you for warning the garrisons and reward you with his tent.
The Divine Lamp: The divine lamp is the ultimate in undead protection. It is held in 1 hand(like a shield) so you will not be able to equip any 2-handed items nor a shield when the lamp is equipped. To find the lamp travel to the Learning Tree tunnel entrance and go 1 screen East, 1 screen North, 1 screen East, 1 screen North, and 1 screen West. You will find a temple in the northwest corner of the map. Enter the temple and make your way to the east end of the temple. There will be a secret passageway that will lead you to a new screen east of the main temple interior. You will find a monk walking around the temple who will tell you about the divine lamp. South of him is an ugly blue woman(sorry, but she just isn't my taste) who goes ballistic and tries to kill you. Kill her and locate the 3 button tiles(ground tiles that have a circle in them which depress and click when you step on them) and walk across them. When you trip the last one a stone slab in the room where the blue woman was will move and the divine lamp will appear. Take it and talk to the monk to finish this mission. Keep the lamp and leave the crypt.
The Diadem of Stone: This item is an excellent helmet that can only be had by choosing a humble ending to one of the quests. The mayor of Dernath will initially send you on a mission to rid the village from the threat of the cyclops. When you complete this mission and return to Dernath the mayor will offer to give you a reward. If you refuse to take a reward he will be amazed at your humility and give to you this helmet as a reward. See? Sometimes it is best to hold out.
The Great War Axe of Misery: Most powerful 2-handed non-ranged weapon in the standard version of POG, it is found within a cave far south of Fantrima. From Fantrima travel 2 screens south and 1 west. Cross the river via the bridge so that you are on the south side of the river on the same screen, then head 1 screen east. About midway down the screen the forest on the eastern edge opens up. Head through this opening and follow as it winds to the south. Head 3 screens south, then 1 screen west. Cross the bridge and go back 1 screen to the east(you will be on the same screen you were previously, but on the south bank now). There will be a large clump of trees hugging the western edge of the map, and on the south side of these trees there is a secret path north through them(it helps if you have the pathfinding ability). In the middle of this clump of trees accessed via the secret path is a cave. Enter the cave and navigate across the maze of bridges until you find the exit to the north. On the north screen head down the long rope bridge to the chest at the end. Within the chest is the Great War Axe of Misery. Equip it quickly, because when you take it a death knight appears behind you and will be coming for you.
The Dwarven Runic Sword: The dwarven runic sword is the most powerful single-handed non-ranged weapon in the standard version of POG. The sword is in the possession of a dwarven trader who will give it to you, if you can earn it. To find the trader first travel to the Wyrm Valley tunnel entrance and then travel 1 screen north, 2 screens west, and then 1 more north. You will find the dwarf standing near a broken cart and several chickens will be running around as well. Talk to the dwarf and tell him you like DrivaTan weapons. When he gets mad insult him until a fight begins. You will be transported to a battlefield opposite the dwarf and be forced to fight him. If you defeat him he will comment on your skill(not your choice of weaponry!) and then give to you the dwarven runic sword free of charge!
The Elven Bow of Destruction: The elven bow of destruction is the most powerful ranged weapon in the standard version of POG. It is located within a cave 1 screen north of Fantrima on the northwest side of the map. The cave is full of molespiders (not too big of a deal) and mindhunters(these guys are a big deal. I recommend having heldan's hat equipped when dealing with them, as armor doesn't help against their mind attacks). The cave is laid out fairly simply. Just follow the cave as it winds around south, west, north, and east to a rope bridge. Walk south along the rope bridge to the last "island" and there will be 2 chests. One of them will contain the elven bow of destruction. Take it and destroy your enemies from a distance!
The Full Elven Plate: The full elven plate is the best armor in the standard version of POG and can be purchased at the blacksmith in Berglum. You can also sometimes find a suit of this armor locked in a chest and guarded by several death knights(I say sometimes because once in a while the armor doesn't load which is a real downer. I've never had this happen, but it has been reported that it does). If you choose to go after it, just be prepared(read: undead protection and health potions!). Alright, to get this gem of protection travel to the Wyrm Valley tunnel entrance and then travel 1 screen west and 2 screens north. In the northern cliff face of this map there will be a cave. Fight your way to the rope bridge southeast of the cave entrance and cross the bridge to the temple. 2 Death Knights will charge you from the south. Kill them and explore the small temple area. You will find 2 chests at the south end of the temple, as well as a potion of strength and luck. Within these chests should be gold, some miscellaneous items and the full elven plate armor. Good luck!
The Lilith Shield: This shield offers the best protection of any shield in the standard game. It can be purchased at the Witch Finger from Kalixa the Witch, or you can pry the shield off the dead body of a lilith. Liliths can be found all over Reef's Island. There is a chance a lilith will drop a shield every time you kill one.
The Ring of the Titan: This ring adds to your strength and armor when you wear it, and can always be found in a cave within Cyclops country. To find the cave travel to Fantrima and then go 2 screens south and 1 west. Cross the river via the bridge so that you are on the south side of the river on the same screen, then head 1 screen east. About midway down the screen the forest on the eastern edge opens up. Head through this opening and follow as it winds to the south 1 screen. Go 1 screen east and you will be on the same screen as the Cyclops coast tunnel entrance. Go 1 more screen north and you will find the cave of the Cyclops on the far northwestern cliff face. Enter the cave and locate the chest in the northwest corner. Inside will be a ring of the titan. (NOTE: there is a bug with this. If you have already have a ring of the titan in your inventory you will get a message saying you found the ring and take it, but a ring will not be added to your inventory. Kudos to ArcAngel Counterstrike for pointing this out.)
The Ring of the Unicorn: The ring of the unicorn gives its bearer a boost in luck and armor while it is worn. To find this boon travel first to Gwyden Camp and then follow the road 1 screen west, 1 screen north, and then 1 screen west again. You will come to the bridge over the Tearos river. If the bridge is not yet completed then you will have to complete a quest first. Cross the bridge and then travel 1 screen west and 1 screen north. Locate the cave at the north end of the map. Inside this cave will be a chest that contains the ring.
The Ring of the Gods: The ring of the gods is the most powerful ring in the standard version of the game. It grants the bearer not only enormous armor protection, but it also raises every stat the player has by 3 points except for speed which is raised by 1 point. The ring of the gods can only be found by successfully killing a sea giant which is quite a task. They also do not drop these rings frequently, making the challenge many times less than rewarding. The sea giants can be found in the south parts of the kingdom, and can always be found around Gidolan Keep. Killing one takes patience, knowledge of blocking, and a healthy supply of potions. If a giant hits you they can do upwards of 200 hit points of damage in 1 blow. So you should have at least 175 hit points before even thinking about challenging them(for you vid masters that are up to a bigger challenge, try to kill one at sub-100 hit points and no cheats!). One final tip for those deciding they must have a ring of the gods is to have a high amount of luck. The more luck you have the better your chances are that the giants will drop one of these beauties.
The Minotaur Scythe: The minotaur scythe is a nice weapon that can not be bought in any store, but can be obtained by prying it out of the cold, dead fingers of a minotaur. Minotaurs can be found on the south coast near the tunnel entrance. They also can be found in a cave within the ruins of High Garendall. Minotaurs are not particularly tough but they do pack a nice wallop.
The Ogre Axe: The ogre axe is a mediocre weapon at best. It is included here because it can not be bought at any store nor found in any location. The only way to get one of these axes(if you want one) is to kill a forest ogre and hope that he drops one. Ogres can be found near the Gidolan Tunnel Entrance and are recognizable by being large and yellowish-green in color carrying a big axe(do not confuse these with sea giants who are wearing red armor and are much, much bigger).
The Dagger of Ferret: This is a small but well-powered dagger(although isn't even close to the heavier weapons) that can not be purchased anywhere. The dagger of ferret boost speed by 1 and dexterity by 3 as per its description, and it also gives +15 to undead protection(which is not included in its description).It is a random item that is sometimes dropped after killing a rogue mage, cyclops, or other semi-powerful creatures. Rogue mages can be found around the Northern Territories Tunnel Entrance and cyclops can be found around the Cyclops Tunnel Entrance.
Seashells: Seashells: Three different colored seashells can be be found on the sandy beaches of coast of Garendall. They can be sold at any merchant or blacksmith. Value varies with color. The have no use in the standard game except for selling them, although plug-ins may change this.
Bestiary:
This is a compilation of the various beasts and monsters found within the Kingdom of Garendall. |
Azarath: Physical evidence of the existence of the creatures known as Azarath has yet to be produced, but from what has
been gathered by stories and rumors are that the Azarath are huge doglike creatures standing about 5 feet tall with a bluish-grey thick fur,
and it's head decorated with horns. According to tales from fishermen of the high seas, Azarath are the companion of another unconfirmed
creature named “Karnack”. |
|
||
 |
Boulder: Also known as the “Earth Demon” because of their eyes and savagery, boulders are evil creatures living
within caverns and caves. It is believed that the boulders have a magical origin but this has not been proven. Small but very sturdy
they are made entirely of rock. A large, sharp blade replaces their right hand causing the boulders to be a bit clumsy. Boulders are
the sworn enemy of the rock imp, as both fight for domination of the
underworld. |
|
||
 |
Cyclops: Feared by all, the Cyclops are huge brutes that live in woods throughout the Garendall kingdom.
They stand at 15 feet tall with thick red skin. Cyclops have a unique eye which is centrally located on their forehead, and
is the cause of their poor vision. Most of the time hungry the life of a Cyclops consists in hunting for food during the day
and sleeping during the night. The Cyclops are somewhat intelligent and will serve anyone who can provide them with enough
food to satisfy their hunger. The eye of the Cyclops is known for its medicinal proprieties, and is highly valued by clerics and
mages. Bands of Cyclops can be found mainly around the
Cyclops Tunnel Entrance. |
|
||
 |
Dark Fairy: The dark fairy will only appear if you have the Dark Fairy
mission. If you have the mission and you have the awareness skill
then you will be able to find the dark fairy. It is very quick but not very powerful. |
|
||
 |
Dark Spirit: Dark spirits are one of the most powerful types of undead. Even though their way of life is a
mystery, their origin is not. Dark spirits were evil elves that violated the rules and codes of nature in such horrible ways
that upon their death they were denied eternal rest. They are now cursed and forced to wander until they find a way to
redeem themselves. Dark spirits hate every form of life as they seek to extract vengeance on anyone they find. This is
why stories about a dark spirit finding eternal peace are as rare as surviving an encounter with one. |
|
||
 |
DeathKnight: It is said that when a knight of any faith betrays the will of his patron deity and in
doing so cause irrevocable harm to people that trusted him, upon his death he will be cursed to become a
death knight. From that point on he will roam in search of souls to devour and torment. Death Knights retain
the skill they had in life and thus are lethal, but they also generate an aura of fear strong enough to give pause
to even the most accomplished adventurer; and those pauses rarely end in anything but death. When in
battle the Death Knight will use a heavy, double-handed sword that burns with the fires of hell. Only a handful
of death knight have been known to exist, among them “Lord Tharwn” is the most famous. |
|
||
 |
Earth Elemental: Earth elemental are servants created by a mage through magical means
to perform a task. But when the creator dies before the enchantment is dispelled, the link binding the
earth elemental to the mage is broken and it is freed to the world at its will. Made of earth, stone and
mud, earth elementals are devoid of any feeling and will fight until their death. They can assume any
physical shape but are usually seen in humanoid form. There are 2 types of Earth Elemental
which look the same: those that pummel with their fists and the more dangerous
kind which can cause the earth to explode beneath your feet from a
distance. Earth elementals are afraid of water and will do
anything to avoid contact with it. |
|
||
 |
Forest Ogre: Forest Ogres live in the forests throughout
the kingdom of Garendall. Armed with their weapon of choice,
the axe; they roam the land in search of prey. Tending to be
more solitary they are rarely seen with others of their kind, as
forest ogres will often fight among themselves for territory or mates.
Forest ogre's axes are known for their quality and durability. |
|
||
 |
Ghoul: Ghouls are the most repulsive type of undead known to
exist in the Garendall Kingdom. According to studies a ghoul was once a
person that made a deal with a devil or demon to grant them a life of joy,
excess and deprivation. Once dead they are cursed to feed upon corpses
and bring fresh souls to the evil which they have become enslaved to.
Ghouls are likely to be found near graveyards but will venture in marshes,
caves, and sometimes into villages to hunt living prey in the hopes of
fulfilling their end of the bargain. |
|
||
 |
Ghoul - Master: A common tale told by mothers to their children in order to frighten them into
obedience is that of the master ghoul. The tale is told that there is a creature called a ghoul that
hunts children that misbehave. When a ghoul devours enough children it is transformed into a creature
even more hideous than it was; the master ghoul. The master ghoul is said to have an even bigger appetite
for misbehaving children, which is coupled by its larger size and strength. Of course most children
stop believing in the master ghoul once they grow up. |
|
||
 |
Goblin: The origin of the goblin is shrouded in mystery,
but from what can be gathered from old tales and legends is
that goblins were magically created a long time ago to serve
as fearless foot soldiers in a grand war, but unfortunately for
their creator, goblins fighting abilities proved to be almost
non-existent. After the war ended goblins dispersed all over
Darmyl. Goblins can be encountered quite often in Garendall;
they serve as soldiers, guards or mercenaries. No goblin
settlements have ever been found, but female goblins
have been known to exist. |
|
||
 |
Goblin - Javelin thrower: The same sort as the above except that instead of stabbing with a spear
they throw javelins at you. They are still weak however. |
|
||
 |
Guardian: In years long since past a powerful group of mages known as the Order of the Seasons
created 4 beings of immense power and called them the guardians. They were designed to test a persons
skill and ability, as well as their morals and values. What was supposed to happen to those proven
worthy has long since been forgotten. Something went wrong and one of the guardians went berserk, killing
the other 3 guardians and attacking any who venture too close to his lair. When in battle the guardian
wields two heavy blades for in close fighting, and at times he will step out of range of melee weapons
and send lightning at his opponent. |
|
||
 |
Ice Elemental: Ice Elementals are, like earth elementals, created by
magic to be guardians or to perform certain tasks for the mage that gave them life.
More intelligent than their cousins of the earth, they are also more cunning and
treacherous and are often used as assassins. In combat the ice elemental will
likely use its hands as blades to cause massive damage to their victim, while
others will send shards of ice through the air to pummel their victim from
afar. Creating an Ice elemental requires much knowledge and power
that only the highest of mages can control. And if the master is killed
before he can dispel the enchantment, the ice elemental is
free.. |
|
||
 |
Ice Imp: Ice imps are the cold-blooded cousins to
the rock imp. Like their cousins they
dwell beneath the ground, though ice imps tend to burrow much
farther beneath the earth. They have an innate loathing of all things
living and will attempt to kill anything that violates their caves. Ice
imps live in colonies averaging 50 to 250 members, structured in
hierarchal fashion. Their head fin is used to display dominance as
it flares out for supremacy and lays flat for submission. It is
rumoured that ice imps drink the warm blood of their victims,
though this is unconfirmed. |
|
||
 |
Jellytor: Jellytor are creations of mages to guard
and clean large dungeons and caves. About 5 feet high they
possess an appendage that they use for orientation as well as
attack. Jellytor are not very mobile and hunt in packs of 2 to 5.
As they absorb whatever they move across, Jellytors are
usually full of coins, bones and other small objects commonly
found on cave floors. |
|
||
 |
Kobold: Kobolds are considered a nuisance throughout
the Garendall kingdom. Mostly encountered in forest regions,
kobolds have also been seen living in caves. They live in
small communities of around 50. The largest kobolds within
the community will travel the land in search of food; mostly cows
and sheep. Kobolds are generally shy and easily scared, but
when food is really scarce bands of kobolds have been known
to attack travellers and even small villages. |
|
||
 |
Kobold - Demonic: A small band of 10 kobolds has taken up residence on the road just south of
Gwyden Camp. They are hardier than most kobolds and to the dismay of travellers
they have resorted to robbery. This band of kobolds can be easily identified by their glowing red
eyes, hence the population refers to them as "demonic." |
|
||
 |
Lilith: According to legend the first liliths
were the offspring of the goddess Sermath and a human
warlord named “Margar.” Liliths live in large, hidden
communities that are secluded and entirely female, as
all liliths and their children are always of the female
gender. Liliths tend to be reclusive and will only
leave their territory to find a suitable male warrior
with which to mate with. Liliths possess fierce
fighting skills and tend to rely on their force and
steel instead of their innate magical abilities. It is
rumoured that their armour is exceptional and
that they will attack anyone who sees them in
order to protect their secrecy. |
|
||
 |
Mage - Rogue Archmage: Rebelling against the rules of their order, Rogue Archmages are those
that have been cast out of all mage societies. Rogue Archmages have red robes with indigo trim and
an indigo hood. Their attacking spells are fireballs which are equal to their strength in magic.
Thurdag Warrh is the most powerful rogue Archmage known in the kingdom. |
|
||
 |
Mage - Rogue: These guys have green robes with red trim and black hoods. Their attacking spells look
like white balls of light with a flickering red glow. They can be found most commonly near the original
headquarters of the Order of Crystal, and throughout the Northern Territories. Rogue Mages, though
they don't give very good XP, give the best items of any Mage. |
|
||
 |
Mage - Wild: Wild Mages have violet robes with indigo trim, and their hoods are violet as well.
Their attacking spells look like large green sparks. |
|
||
 |
Manticore: Few have the chance to see a
manticore and survive to tell about it. Part lion and
part dragon, manticores are deadly. They have
exceptional olfactory sense and can smell a prey from
miles away. They have poisonous spikes on their tail
that can paralyse their victims before ripping them
apart with their powerful claws and Jaw. Manticores
are very intelligent but can be bribed to servitude
if the right price is paid to buy their loyalty. |
|
||
 |
Medusa: Serpent witch, stone goddess and
gazer of stone are all names given to the creature
medusa. Medusas are women that have snakes as
hair and that live in underground caves. Medusas are
known to make sacrifices with babies and young
infants they steal from villages in order to further
their study and practice of the dark arts. Very
deadly in combat medusa have sharp nail that can
rip trough flesh and armour. Contrary to popular
belief the gaze of the medusa is deadly only when
she is her cave. |
|
||
 |
Mindhunter: Living deep below the earth's
surface these creatures are feared by scholars and mages
alike. 7 feet in height with deep blue skin and a gaunt
figure, mindhunters are knowledge seekers. Unlike
normal scholars however, they acquire their knowledge
by stealing it directly from their victims mind, which
is their primary and most effective form of attack.
Once under the mindhunter's control the victim
will let him take all his knowledge, only to be killed
a few moments afterward. Mind hunters are also
fierce warriors and potent magic-users and will
make use of those skills if necessary. Killing a
mindhunter shortly after they steal a victim's
knowledge will restore the knowledge to the
proper owner. |
|
||
 |
Minotaur: Few things are known about minotaur
even though many attempts to study the beast have been made. It is known that
minotaur are exceptional warriors, they are ruthless and fast, and that while some
minotaur utilize axes and swords their weapon of choice is the scythe. They usually
travel alone or in small groups of 2 or 3. Recently, rumours of minotaur slave trader
ships raiding coastal villages north of the Garendall range have started to circulate.
These rumours have not been confirmed, however. |
|
||
 |
Minotaur - White: Similar to their darker skinned breatheren in build, the white minotaur
tend to live in caves and mountain ranges. White minotaur are more communal and it is reported that
societies exist though none have ever been found. |
|
||
 |
Molespider: Due to living most of their life
underground the molespider is devoid of eyes, but is
gifted with a strong olfactory sense. Twice a year
molespiders will come to the surface to hunt for food.
Using their own eggs as bait they will lay trap for
Vorkt and kobolds. If they catch enough prey to
survive until the next egg laying season the spider
will go back underground. If not she will wait
until the eggs hatch and will devour the young
spiders. |
|
||
 |
Mushooze: Living in caves and dungeons
mushooze are a gathering of rotting mushroom that
eventually create a life of their own. It is not known
how or why they come to life but what is known is
that mushooze are very deadly. Their acidic spit
can and will cause severe burns upon any substance
it touches, even armour. The biggest mushroom
ever found was 200 feet in diameter. |
|
||
 |
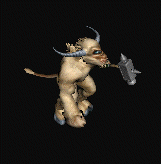
Ookwasp: Ookwasps are a very large
and very mean species of wasp. They live in
large underground hives that can span for miles.
Even though they feed on small mammals and
occasionally cattle, ookwasps will not hesitate
to attack humans travelling too close to the
hive. Armed with a sharp hook and a poisonous
spike on their tail ookwasps will swarm and
attempt to kill their prey in seconds. Forest
ogres loves the taste of ookwasp flesh. |
|
||
 |
Ookwasp - Killers: Cousin to the normal ookwasp, Killers are identifiable by their much larger
size and their greyish coloring. Killers live to kill as their name implies, and will attack anything
that moves. Rumor has it that the killer ookwasps are not native to the Garendall Kingdom, which draws
support because no hives have been located. There have been reports of killer ookwasps being spotted
near where the bridge is being constructed over the Tearos River, however. |
|
||
 |
Rock Imp: A usually quiet and reclusive race, rock imps
are very protective of their territory and will attack anyone trespassing
within it. They live in colonies of 10 to 100 imps in a typical hierarchal
system. They grow to between 5 and 6 feet in height, tend to be
muscular, and they can change the appearance of their skin to match
their surroundings. Their huge head fin is used to display dominance
and there are rumours that the fin can emit and receive telepathic
powers. Rock imps can't stand sunlight and will very rarely travel
outside. |
|
||
 |
Rocky Spider: Very little is known about the rocky spider.
They live underground, typically in deep caves, and they come to the
surface very rarely. They have a deep blue coloring which is speculated
to indicate that this spider is poisonous. Rocky spiders tend to hunt in
packs and move very quickly. |
|
||
 |
Sea Giant: Very little is known about the Sea Giants,
or Karnack as the fishermen of the high seas call them. It is told
through tales and stories that the Karnack stand about 20 feet high.
They are reputed to be amphibious and can swim underwater for
a very long time. They are held responsible for many lost ships,
but such claims cannot be proven. It is rumoured that a group
of Karnacks have besieged Gidolan Keep, but this is mostly
believed to be a fictitious tale, as no Karnack has ever been
seen in the Garendall kingdom.. |
|
||
 |
Semenon: Once only myths the Semenons
are now well known by the inhabitants of Garendall.
Semenons are physically weak and will usually rely
on their cunning to catch their prey unaware. If they
are unable to surprise their prey Semenons will
sometimes resort to treachery, promising wealth
and treasures to lure the victim back to the pack.
When forced to fight, either alone or in a pack,
Semenons are savage and fight with a lust for blood.
They make their lairs in caves and within humid
regions like marshes. They have a fascination
with jewellery and their dens are reputed to be
quite rich. |
|
||
 |
Semenon - Master: Every semenon society
has a semenon master lurking somewhere within the
shadows. Perhaps a sub-species and perhaps a
different species altogether, very little is known about
the origins of the semenon masters. They seem to
have the utmost control over the semenon society,
and all semenons follow the masters without question.
The masters have a tendency to lurk in the shadows
and not make their presence known to outsiders,
but if cornered or forced to fight they can be vicious
and merciless. |
|
||
 |
Stone Giant: Legend has it that eons ego stone giant society
was proud and striving, and that their empire spread well beyond what is
now the Garendall mountain range. But these days stone giants are nothing
but a rag tag bunch of troublemakers, raiding small villages and attacking
caravan routes. Stone giants live in hills and mountains in bands that can
reach 50 members. Averaging 10 feet in height they possess incredible
physical strength and are able the squash anything smaller than a human
with a single blow of their stone club. Not really made of stone, their blue
grey skin, physical toughness, and their long life spans earned them
their name. |
|
||
 |
Termite - White: Originally hunted because of their wood eating diet,
inhabitants of the kingdom have learned to domesticate the termite for use as wood
cutting beasts. Domesticated termites have learned to live in the presence of humans
but if provoked they will fight back with their vicious twin bladed tail. Even though
many termites have been domesticated, herds of wild termite still exist and can be
encountered in remote parts of the kingdom. These termites have also been
named devil termites, with “devil” spawning from the 2 little horns the termites
have on their head. The horns, it is believed, are used for communication
between one termite to another. |
|
||
 |
Termite - Red: A larger and more fierce species of termite. These termites are more commonly
referred by the nickname "devil termite" than their smaller cousins, due to their reddish carapace and
more aggressive nature. |
|
||
 |
Thief - Brown robe: Weakest of the thieves. They will attack with a dagger thrust which is
slightly more damaging than a goblin's thrust. |
|
||
 |
Thief - Blue robe: A bit more powerful than the brown robed thieves, the blue robes will attack
either with a dagger thrust or they can throw a dagger some distance. |
|
||
 |
Thief - Red robe: The most powerful of the thieves the red robes can all either thrust with
their daggers or throw them. This brand of thief not only has the most hit points but also inflict the
most damage. |
|
||
 |
Thivuk: Of all the creatures living in the Garendall
Kingdom the thivuk is one of the most bizarre. Thivuk have the
lower body of a salamander and the upper body of a man, are
typically green in colour, and usually carry a lance as their
weapon of choice. Thivuk are basically evil and they will attack
anything or anyone crossing their path. Their repeated attacks
on woodcutter camp have earned them the nickname
“Guardian of the forest.” Thivuk are highly intelligent, and
have been known interact with druids when need be. |
|
||
 |
Troll: Trolls are the assassins of the woods, as many a traveller
has fallen victim of their vicious attacks. Expert in hiding themselves in shadows,
trolls tend to rely on trickery and quickness to get their prey. While physically
strong trolls lack endurance and try to avoid long engagements whenever
possible, and typically will not give chase for long. Trolls despise wearing
clothing as they prefer not to make noise nor hinder movement. They live
in small bands scattered around the kingdom and travel from region to
region looking for food, fun and travellers to pillage. Contrary to popular
belief trolls are not dumb. Several of the more civilized ones have joined
assassin rings in different cities of the kingdom. |
|
||
 |
Wyrm: Smaller than their cousin the dragon, wryms are nonetheless
very dangerous. Sharp teeth and claws, powerful legs, and massive wings are a
few of the attributes that make the wrym such a formidable foe. Living in small
packs of 5 to 10, they are usually not very aggressive and if they are not hungry
will typically let a trespasser go unharmed unless they get too close to their nest.
Wryms can't breathe fire nor can they fly, but they can glide for short distances.
Domestication of a wrym can and has been done in the past but requires
extreme patience. The legends say that Durnakar Oesterwell, a powerful wind
mage, once owned and trained 50 wryms. |
|
||
 |
Zombie: According to scholars and studies on the subject,
zombies can be created through 2 methods: a priest or a magician can
magically create them, or a person can make a pact with a
“higher force” to be brought back to life as a zombie after their death.
Either way the result is the same. Zombie are slow but ruthless, exist
only to destroy and to kill, and should be considered very dangerous.
The only sure way to kill a zombie is to decapitate him. |
|
||
 |
Zombie - Revenant: Revenants are more dangerous versions of the zombie, as they are larger,
stronger, and faster. Scholars have been unable to say for sure why some people are brought to undeath
as zombies while others as revenants. 2 speculations persist more than others though: first that it
has to do with the strength of the individual before their mortal death(the stronger they are making the
likelihood of becoming a revenant greater) and the second is the power of the being they made the pact
with(the stronger the being the greater the chance of becoming a revenant). Perhaps both play a role.
|
|
Secrets of POG:
These are the various secrets and easter eggs hidden within the kingdom of Garendall. Some are potent, some are silly, and some just add closure to open storylines.The Blue Mushroom: The blue mushroom is a very potent fungus that will increase your vitality by 5 points, which translates into extra stamina points every time you increase in level! Obviously the sooner you find and inhale this funky shroom the better. From the Plains of the Endless Winds tunnel entrance travel 1 screen east and then 1 screen south. Find the cave at the end of the road which is in the center of the map. Enter the cave and fight your way to the south end and exit the cave. Travel 2 more screens south. When you enter this screen from the north end(heading south) the tree line on the east and west side will "V" in towards the south. At the tip of the V, before it travels straight south a ways, there is a secret path through the trees in the western edge. Travel west along this path and you will find a waterfall. You can walk up to the waterfall from the eastern shore, and if you walk into the waterfall you will enter a cave. In the center of this cave is a bright blue, pulsating mushroom, glowing in full potency. Grab it and snack on it. It's mm mm good!
Awakening the Spirit of Nature: A scholar at the Learning Tree tells a story about the spirit of nature going to sleep and needing to be awakened, but then nothing else ever becomes of it. But where is the spirit, and what is needed to awaken it? Well it is obvious something magical is needed, and the spirit is a thing of nature. What is needed to awaken it is the herbs from the Magical Herbs quest. Once you have picked the herbs and have them in your possession you need to find the slumbering nature spirit. Well, the spirit is a happy spirit. Happy people smile a lot. And where have we seen a happy face? From the Plains of the Endless Winds tunnel entrance cross the bridge to the south and then head 1 screen west. On the south side of the river just south of the center of the map you will find a "smiley face" made from tree stumps and a rock formation. Enter the smiley face and touch the "nose" with the herbs in your inventory and the spirit will awaken. So happy is it that it will grant you a nice boon.
Swimming at the Pink Termite: The Pink Termite resort is a hotbed for weary adventurers and partygoers alike. It is a place that is carefree, where you can let your hair down, errr, well our hero constantly has his hair down. Anyhow amongst the activities at the resort are such diverse elements as swimming(that's pretty much it). But there is a neat little trick with this. You have to buy a ticket to go swimming(80 gold), and if you do it 5 times you will be rewarded with a bonus of 10 stamina points! However you can only receive the bonus once. To locate the Pink Termite resort first travel to Gwyden Camp and follow the road 1 screen west, 1 screen north, and then 1 more screen to the west. On this screen will be the Tearos river, and if the bridge over it is not yet completed then you will need to first finish a quest. Cross the bridge and then go 2 screens south. The beach is located on the southeast side of the west bank, and the resort(where you buy tickets) is on the southwest corner of the map. Enjoy yourself at the resort, and don't wear yourself out too much.
Opening All of the Termite Tunnels: There is a man that walks around Fantrima who constantly is obsessing about the termite tunnels. He explains to you at the beginning(if you talk to him) what the tunnels are and what they had been used for. After he imparts his knowledge he is rather quickly forgotten. However, if you manage to open all of the termite tunnels(the tunnel entrances that allow you to move around the world quickly) and then return to Fantrima and speak with him again(he is located just southeast of the fountain), he will reward you with 500 gold.
Buying a Termite: There is a man who raises termites and will sell a termite to you for 100 gold coins. He lives 1S,1W of Fantrima in a house on the southern portion of the screen. He will sell you either a male or a female termite, although it doesn't make a difference which one you purchase if you choose to purchase one. After you buy one nothing happens. Joy! But in your travels if you happen to go to the Cyclops tunnel entrance and journey 1 north of the tunnel entrance, you will find a delivery person travelling to Gidolan Keep to deliver a termite. This delivery person will only be there if you have purchased a termite. Sadly this is all there is to buying a termite in the standard game.
Elven Bed: There is a woman in Berglum who needs her bed moved, and her husband is off hunting Ookwasps. She asks that you, the hero, move her bed for her. Pretty suggestive, no? Well if you agree then for all of your effort she must let you spend the night, because after the screen does a fade out and in your stamina is completely filled. Better than staying at the inn and at no charge too! Alas you can only do this once. It must have been better for you than for her.
Lilith Shrine: On the southeastern quadrant of Reef's Island there is an enclosure rocks with a fire pit within it. If you enter the enclosure and wander around inside it, six Liliths will come to defend the desecration of their shrine. The defenders only appear if you enter the shrine, and do not appear on the overhead map nor prevent the use of General Decimus's tent, unless the shrine is entered. These Liliths are weaker than the normal Lilith breed, but will normally drop nice equipment. If you return to this location after exiting the area six more Liliths will defend the shrine making for endless fun.
Where is:
Directions to the various locations within Garendall.The Learning Tree: From Fantrima follow the road north 2 screens and you will find a long bridge crossing a river. Cross this bridge and travel 1 more screen north. The road bends here to the east; follow it 1 screen east. The road bends to the north and there is a scholar on the west side of the road on this screen. Directly east of him within the trees is the learning tree.
Total movement directions from Fantrima: 3 north, 1 east
Gwyden Camp: From The Learning Tree make your way back to the road and follow it to the north 1 screen and east 1 screen. From here you can take either follow the road back to the west 1 screen(but north of where you were before), north 1 screen, and then east 1 screen, OR you can take a shortcut by leaving the road and cutting through the forest to the northeast side of the map and travelling 1 north and following the path up to the road. Either way you go(shortcut or not) you now just need to follow the road 1 more screen north and you will find Gwyden Camp around the center of the map.
Total movement directions from the Learning Tree by road: 1N,1E,1W,1N,1E,1N
Total movement directions from the Learning Tree w/ shortcut: 1N,1E,2N
Berglum: From Gwyden Camp follow the road to the west 1 screen, and continue following it as it travels north 1 screen and then west 1 screen. Cross the bridge over the Tearos river(if the bridge isn't built yet, you need to first complete the Tearos Bridge mission first). On the west side of the bridge follow the road 4 screens west and then 1 screen north. You will find Berglum on the west side of this screen.
Total movement directions from Gwyden Camp: 1W,1N,5W,1N
Dernath: From Fantrima follow the road north for 2 screens. On this screen you want to stay on the south side of the river - Do not cross the bridge! There is a wide break in the trees on the east side of the map, head 1 screen east. On this screen there will be a small lake. Walk around the lake and then head 1 screen east. Travel 3 screens south and you will find Dernath on the western side of the map.
Total movement directions from Fantrima: 2N,2E,3S
Plains of the Endless Winds: From Gwyden Camp follow the road to the west 1 screen, and continue following it as it travels north 1 screen and then west 1 screen. Cross the bridge over the Tearos river(if the bridge isn't built yet, you need to first complete the Tearos Bridge mission first). On the west side of the bridge follow the road 2 screens west, then travel 2 screens south. You will now be standing at the beginning of the Plains of the Endless Winds which stretch out to the south, east, and west for many screens.
Total movement directions from Gwyden Camp: 1W,1N,3W,2S
Wyrm Valley: From Gwyden Camp travel through the forest 1 screen to the north. When you reach the river you can either cross the bridge to be on the north side of the river and then head 1 screen east, or travel 1 screen east and then cross the bridge there to get on the north side of the river. From there travel 1 screen north, cross the bridge in the middle of the map and head 1 screen east. You are now at the beginning of the area called Wyrm Valley which spreads across many screens.
Total movement directions from Gwyden Camp: 1N,1E,1N,1E
Witch Finger:From the Plains of the Endless Winds tunnel entrance head south 1 screen and then travel 3 screens to the west. There will be a cave on the northwestern edge of the map. Enter this cave and fight your way to the southwestern exit to go to the tunnel entrance, or 1 screen south and then locate the exit on the southeast side of the screen to get to the house of Kalixa the Witch.
Total movement directions from the Plains of the Endless Winds tunnel entrance: 1S, 3W, through the cave
High Garendall: From Gwyden Camp follow the road to the west 1 screen, and continue following it as it travels north 1 screen and then west 1 screen. Cross the bridge over the Tearos river(if the bridge isn't built yet, you need to first complete the Tearos Bridge mission first). Travel 1 screen west from the bridge, and then trek 4 screens north. You will find a temple on this screen which is only accessible once you have completed the Evil Ring portion of the Learning Tree missions. Enter the temple and fight your way to the eastern exit. When you leave the temple you will be on the same map as you were when you entered, but on the east side of the cliffs. From here travel 1 screen east and there will be a bridge on the north side of this map. Cross the bridge and travel 1 screen north and you will be in the ruins of High Garendall.
Total movement directions from Gwyden Camp: 1W,1N,2W,4N,through the temple,1E,1N
Reef's Island: Reef's Island can not be accessed from the main land as it is an island off the west coast of Garendall. There is a ship at dock in the western half of Berglum that will take you to Reef's Island. However you must first have access to the third level of the Learning Tree(attainable by completing the evil ring part of the Learning Tree missions). Once you have this access go to the top level and search the book for "Reef's Island" and you will be told some information about the island. Travel to Berglum and speak with the captain of the ship(the man walking around on the docks in front of his ship). He will send you on a short mission to find a stolen statue. When you return the statue to him he will take you to Reef's Island whenever you ask him to.
The Old Dwarf: From Fantrima go 2 screens south and 1 west. Cross the river via the bridge so that you are on the south side of the river on the same screen, then head 1 screen east. About midway down the screen the forest on the eastern edge opens up. Head through this opening and follow as it winds to the south. Head 3 screens south, then 1 screen west. Cross the bridge and look for the dwarf on the south edge of this map.
Total movement directions from Fantrima: 2S,1W,1E,3S,1W
Fungus's Getaway: Located 1 screen east of the North Gidolan Tunnel Entance, Fungus's treehouse is not to be missed. Fungus will gladly let you spend the night for free. Awake refreshed (full stamina) then sell him some of the items you've picked up in your travels. Being a remote outpost supplies are hard to come by and he's willing to pay twice the going rate for your stuff.
Total movement directions from the North Gidolan tunnel entrance: 1E
The Fantrima Tunnel Entrance: From Fantrima travel 1 screen north and then 1 screen west. The tunnel entrance is located on the southwest corner of the map.
Total movement directions from Fantrima: 1N,1W
Tunnel position: Southwest corner of map
The Learning Tree Tunnel Entrance: From the Learning Tree travel to the southeast corner of the map and head 1 screen to the east. The tunnel entrance is located on the eastern side of the map.
Total movement directions from the Learning Tree: 1E
Tunnel position: Eastern side of the map
The Gwyden Camp Tunnel Entrance: From Gwyden Camp follow the road out of the camp 1 screen to the west and then 1 screen to the north. The tunnel entrance is near the center of the map.
Total movement directions from Gwyden Camp: 1W, 1N
Tunnel position: Center of the map
The Berglum Tunnel Entrance: The Berglum tunnel entrance is on the same screen as the eastern half of the village. The tunnel entrance is located in the forest to the northeast of the village. Total movement directions from Berglum: None
Tunnel position: Northeast side of the map
The Dernath Tunnel Entrance: From Dernath travel 2 screens north and the tunnel entrance is on the southwest side of the map.
Total movement directions from Dernath: 2N
Tunnel position: Southwest side of the map
The Plains of the Endless Winds Tunnel Entrance: From the eastern half of Berglum follow the road 1 screen south and then 2 screens east. Leave the road and travel 3 screens south and then 1 screen west. Cross the river and look for the tunnel entrance near the center of the map.
Total movement directions from Berglum: 1S,2E,3S,1W
Tunnel position: Center of map
The Witches Finger Tunnel Entrance: From the Plains of the Endless Winds tunnel entrance head south 1 screen and then travel 3 screens to the west. There will be a cave on the northwestern edge of the map. Enter this cave and fight your way to the exit on the southwest side of the map that you entered on. The tunnel entrance is on the west side of the map.
Total movement directions from the Plains of Endless Winds tunnel entrance: 1S,3W, through the cave
Tunnel position: West edge of map
The North Gidolan Tunnel Entrance: From the eastern half of Berglum follow the road 1 screen south and then 2 screens east. Leave the road and travel 4 screens south and locate a cave at the end of the road(middle of the map). Enter the cave and fight your way to the southern exit and leave the cave. From the cave travel 4 screens south and look for the tunnel entrance just northeast of the center of the map.
Total movement directions from Berglum: 1S,2E,4S,through cave, 4S
Tunnel position: Slightly northeast of the center of the map
The South Coast Tunnel Entrance: From Fantrima go 2 screens south and 1 west. Cross the river via the bridge so that you are on the south side of the river on the same screen, then head 1 screen east. About midway down the screen the forest on the eastern edge opens up. Head through this opening and follow as it winds to the south. Head 3 screens south, then 2 screens west, and 1 more south. Look for the tunnel entrance near the center of the map.
Total movement directions from Fantrima: 2S,1W,1E,3S,2W,1S
Tunnel position: Center of the map
The Cyclops Tunnel Entrance: From Fantrima go 2 screens south and 1 west. Cross the river via the bridge so that you are on the south side of the river on the same screen, then head 1 screen east. About midway down the screen the forest on the eastern edge opens up. Head through this opening and follow as it winds to the south. Head 1 screen south and then 1 screen east. Look for the tunnel on the western side of the map.
Total movement directions from Fantrima: 2S,1W,1E,1S,1E
Tunnel position: Western side of the map
The Wyrm Valley Tunnel Entrance: From Gwyden Camp travel through the forest 1 screen to the north. When you reach the river you can either cross the bridge to be on the north side of the river and then head 1 screen east, or travel 1 screen east and then cross the bridge there to get on the north side of the river. From there travel 1 screen north, cross the bridge in the middle of the map and head 1 screen east. Locate the tunnel northwest of the center of the map.
Total movement directions from Gwyden Camp: 1N,1E,1N,1E
Tunnel position: Northwest of the center of the map
The Northern Territories Tunnel Entrance: From Gwyden Camp follow the road to the west 1 screen, and continue following it as it travels north 1 screen and then west 1 screen. Cross the bridge over the Tearos river(if the bridge isn't built yet, you need to first complete the Tearos Bridge mission first). Travel 3 screens north and then 1 screen east. The tunnel is located slightly north of the center of the map.
Total movement directions from Gwyden Camp: 1W,1N,1W,3N,1E
Tunnel position: Just north of the center of the map
Plug-in Information:
Information on the various 3rd party plug-ins that have been designed to change or extend the game play of Pillars of Garendall.Trinity:
Designed by Beenox, makers of the Pillars of Garendall game, to display a small collection of what a plug-in can be created to do. It adds 3 classes to the standard game: swordsman, ranger, and conjuror. It also adds guilds specific to each of the new classes, alchemy and spells for the new classes, a new shop, and a travelling salesman.Swordsman class: During their life at Gidolan Keep, Swordsmen spend most of their spare time training to strengthen combat skills. This accounts for their superior strength and ability to master most close-combat weapons. Swordsmen can wield any weapon save ranged and those of magical quality, and they are able to wear even the heaviest of armours. Swordsmen begin the game with a large bonus to stamina.
-
Swordsmen benefits: Due to their constant training the swordsman is able to improve his statistics
every 3 levels. Upon gaining every third level the statistic screen pops up and you can choose which
stat to increase by 1.
- Swordsmen's guild: If you've dedicated your life to 'the way of the blade' then the guard at the enterance to the guild will let you pass. Inside you'll find Brutus "Ratchewer" Grunt, his brother Boris "Ratseeker" and Grurk the keeper of the Swordsmen Guild beasts. Here you can fight in the arena, buy some nice steel, or even pick up the odd job of Goblin collection engineer. The guild is located 1 screen south of Fantrima on the same screen as you will find Septembris. The guild is inside a cave which is near the center of the area.
Total movement directions from fantrima: 1S
Guild position: Near the center of the map
- Swordsmen's guild: If you've dedicated your life to 'the way of the blade' then the guard at the enterance to the guild will let you pass. Inside you'll find Brutus "Ratchewer" Grunt, his brother Boris "Ratseeker" and Grurk the keeper of the Swordsmen Guild beasts. Here you can fight in the arena, buy some nice steel, or even pick up the odd job of Goblin collection engineer. The guild is located 1 screen south of Fantrima on the same screen as you will find Septembris. The guild is inside a cave which is near the center of the area.
-
Alchemy: The Ranger is able to learn alchemy skills through two ways: experience in that every
2 levels he gains a new alchemy recipe, or by finding a tome that contains a recipe and 'using' it,
thereby committing it to memory. Pressing 'V' accesses the ranger's recipe book which can be scanned
through until a choice is made. Clicking on the recipe will cause the ranger to create a potion which
will be added to his inventory, assuming he has all the ingredients required to mix the potion.
- 1st Level Recipes:
- Forest stew - restores 20 HP - ingredients: fresh apple + forest mushroom
- Habuna Powder - gives temp +10 strength - ingredients: echinoc flowers + habuna herbs
- Lavunith Powder Mix - slows down foe - ingredients: lavunith flowers + rotten apple seeds
- 2nd Level Recipes:
- Undead Powder Mix - temp +10 undead protection - ingredients: holy dark seeds + lavunith flowers + healing concoction
- Earth Mole - dig your way to nearest tunnel - ingredients: solid metal shovel
- Luck Infusion - temp luck boost - ingredients: echinoc flowers + fennellys flowers + healing infusion
- Eagle Eye - see the whole map - ingredients: forest mushroom + wild thusy herbs + fennellys flowers
- 3rd Level Recipes:
- Poison - poison all nearby foes - ingredients: echinoc flowers + lavunith flowers + wild thusy herbs
- Sharpshooter - temp marksmanship increase - ingredients: echinoc flowers + fennellys flowers + habuna herbs + holy dark seeds
- Hard Shell Powder - temp protection increase - ingredients: habuna herbs + wild thusy herbs + echinoc flowers + fennellys flowers
- 4th Level Recipes:
- Minotaur Potion - changes player into a white minotaur - ingredients: echinoc flowers + fennellys flowers + habuna herbs + wild thusy herbs + holy dark seeds + rotten apple seeds
- Ranger's guild - Nohrga Village: The Friends of the Forest that inhabit this small forest village are suspious of all who travel Grandall but if you 'follow the way of nature" you will be welcomed and let in on family gossip. If you inquire about 'Herbs and flowers' you'll learn where the smart herbalists in the kingdom go to buy at wholesale. Advised to speak with Master Norhga (one hut to the east) in his shop you will find some the best weapons and armour in the kingdom. As for the herbs Master Nohrga sells, here you'll find quality and the best prices in the game. To get to Nohrga's Village simply travel to the North Gidolan tunnel entrance and travel 1 screen to the north. There is a section of forest that runs north and south down the center of the screen. There is a secret entrance through this forest that leads to the village, located on both the east and west sides of the forst about a third of the way up from the south end of the map. Go through this secret entrance and it will lead to a clearing. The village lies north of the clearing.
Total movement directions from the North Gidolan tunnel entrance: 1N
Village position: South of the center of the map
- 1st Level Recipes:
-
Spells: Spells are the lifeblood of the conjuror but they don't come easily nor quickly. The conjuror
can learn spells 2 ways: through experience by gaining a new spell for every 3 levels they achieve, and by
finding tomes containing magical spells and 'using' them, thus committing the new spells to memory. To use
a spell that has been learned one needs only press 'V' to access the spell panel and choose the spell
to cast. Pressing 'C' at any time will cast the last spell selected, making repeated spells quick and
easy. Some spells require targetting an enemy after casting the spell.
- 1st level: magical arrow, protection, slow, weaken
- 2nd level: enfeeble, fiery arrow, magical armor
- 3rd level: revelation, sanctuary, strengthen
- 4th level: earthquake, fiery blast
- Conjuror's guild: There is a place of learning where all the kingdom's conjurors gather to practice and study, and this is called the Mage's tower. It is a place that all conjurors can find safe-haven and purchase magical items if they are deemed worthy enough. The Mage's tower is selective though in its membership. In order to gain access to the main tower the aspiring conjuror must first beat the brain teasing puzzles that challenge ones reasoning ability. The Mage's tower is located 1 screen west of the Cyclops Coast tunnel entrance in the northeeastern corner.
Total movement directions from the Cyclops Coast tunnel entrance: 1W
Tower position: Northeastern corner of the map
- Tower puzzles: The puzzles within the tower are meant to test the conjurer's reasoning and problem solving skills. The idea behind the puzzles is that with 3 of the 4 puzzles there will be a small 'map' on the deleportation disk(the circle on the northern edge of the tower where you materialized after teleportation) that corresponds with the puzzle buttons in the main part of the room. Your goal is to walk onto the buttons to activate/deactivate them in such a way as their pattern looks like the small map.
The tower puzzles consist of 9 buttons arranged in three rows of three, and can be thought of as a keypad on a keyboard; the number '9' refers to the button on the northeast corner, the number '5' refers to the center button, and so on. When solving the puzzle any button that the character touches will be considered activated so be careful only to touch those buttons that are intended to be activated. It is advised to use the keypad for movement instead of the mouse, as user control is greater with the keypad and unintentional mistakes are less likely to occur.

Each button is a trigger that activates or deactivates 3-5 other buttons, allowing the puzzle to be solved. To the left is a chart that details which buttons activate/deactivate the other buttons. Each "square" is positioned to represent a key on the keypad, which also corresponds to the buttons in the puzzle. The 'X's on the map represent the buttons which are activated/deactivated upon triggering the key in question. Map courtesy of Rubber Ducky - Tower puzzle 1: Activate the following buttons: 3-4-5-7-9
- Tower puzzle 2: Activate the following buttons: 2-3-5-6-7-8-9
- Tower puzzle 3: Activate the following buttons: 2-3-6-7-8-9
- Tower puzzle 4: The final puzzle takes place on a large clock face. To solve this puzzle do the following: Walk through the center of the clock from the bottom(6 o'clock side) vertically (towards the 12 o'clock side) and step back on the last button twice. The minutes are now set. Now walk sideways from the left, go two buttons in and then go back. Walk around to the right side and walk through to the left side(staring at the 3 o'clock position and ending at the 9 o'clock position), then step back onto the last switch twice. The hours are now set and the puzzle is solved.
- Tower puzzle 2: Activate the following buttons: 2-3-5-6-7-8-9
Sapphire:
A 3rd party plug-in created by Victor M. Cardoso (viktor@mac.com). This plug-in adds a short quest to save a girl's father from a blue dragon.Beginning the quest: The quest begins in the town of Fantrima. Just southeast of the town fountain a little girl will have been added. Speak to her and the quest shall begin.
Locating the Blue Dragon: The blue dragon resides within Wyrm Valley. He can be found by travelling 1 screen north and 1 west from the Wyrm Valley tunnel entrance, and then searching the forest for a secret path. Within the forest the dragon is lurking.
Finding Sapphire's Father: Sapphire's father is on the same screen as the dragon, which is 1 screen north and 1 screen west from the Wyrm Valley tunnel entrance. Find her father hiding out in a secret section among the trees.
Sapphire's Bestiary: This is a compilation of the various beasts and monsters added with the Sapphire plug-in.
| ">No picture yet |
Blue Dragon: |
|
">No picture yet |
Wild Spider: |
|
Spells Expander:
A 3rd party plug-in created by Michael Zeman(stark@evula.net). This plug-in adds a bunch of spells for the conjurer class, as well as several quests, and items that can be used by all classes. For more information, visit the Spells Expander webpage.Spell list:
- 1st level: Blink, Deteriorate, Entangle, Lesser Healing, Regenerate
- 2nd level: Circle of Fire, Demolish, Greater Healing, Magic Mirror, Revitalize, Scry
- 3rd level: Fire web, Erase Memory, Mark, Recall, Query Memory
- 4th level: Relocate, Restore Health, Ring of Fire, Wizard of War
- 5th level: Portal, Pandora's Box
- 6th level: Evoke Life, Moki, Ritual of Desecration
Spell locations:
- Fantrima(Eltar): Blink, Deteriorate, Entangle, Lesser Healing, Regenerate, Scry
- Fayleese's Cellar: Portal, Relocate
- Gwyden Camp(Mura): Circle of Fire, Demolish, Greater Healing, Revitalize
- Learning Tree(top level): Pandora's Box
- Swordsman's Guild: Moki
- Tower of Magi(Quarius): Fire web, Mark/Erase Memory, Recall/Query Memory, Magic Mirror
- Tower of Magi(Bernard's room): Restore Health, Ring of Fire, Wizard of War
- Tower of Magi(the Vault): Ritual of Desecration
- Pandora's Box: Evoke Life
Item list:
- Bernard's Crystal: Trades health points for magic points. Given to player by Fayleese in order to allow player to talk with Bernard.
- Blood stone: Heals the player
- Blue-vial: Sometimes increase dexterity, sometimes decreases...
- Courage: A fine blade that has random powers. One of the items available upon completing the swordsman's guild quest.
- Croyam's Crown: A golden crown that regenerates magic points. Located in the player's room within the Tower of the Magi.
- Elixir of Wisdom: Increases wisdom
- Giant Axe: A very large, heavy axe. Sometimes dropped by Sea Giants.
- Necklace of Palin: A silver necklace that regenerates health points. One of the items available upon completing the swordsman's guild quest.
- Quicksilver Ring: A ring that boosts speed. Sometimes dropped by Sea Giants.
- Red-vial: Increases strength sometimes, sometimes decreases...
- Staff of Lordship: Very potent weapon that calls down lightning upon multiple foes. The staff can only be obtained at the end of the earth-friend quest.
Quests:
Rescuing Fayleese
Speaking with Bernard
Recovering the Tome of Warfare
Earth-friend
Troubleshooting:
Having a problem getting Pillars of Garendall to work? Chances are that if you are experiencing a problem, someone else has had a similar problem. Below are solutions to some of the problems users have had.What is the most current version of PoG?
The most current version of PoG is 1.0.2 for both the Macintosh and Windows. You can download the update program to bring the Mac version up to 1.0.2 here and you can get the update program to bring the Windows version up to 1.0.2 here.
I get an error when unstuffing PoG or various plug-ins
Always use the latest version of stuffit expander. Using an older version can sometimes cause problems or give strange errors when unstuffing the file. The latest version of stuffit expander for both Mac and Windows can be found here.
I get an error about Internet Config
The demo version of PoG has a “Buy Now” button. If the user clicks on the buy now button, PoG looks for an internet connection, and connects the user to AmbrosiaSW.com if it finds one. This only affects Macs running OS9.0. Updating to OS9.1 or later will update the Internet Config extension, and take care of this problem.
The Mac PoG demo quits to the Finder as soon as it opens
This is a problem with an earlier version of the Demo. First, go to your Preferences folder in the System folder and trash the file called “emitgop”. Then update to the latest version of the Mac PoG Demo at: http://www.ambrosiasw.com/cgi-bin/vftp/dl-redirect.pl/mac_pog_demo_update.sit?path=pog/essentials&file=mac_pog_demo_update.sit.
I get an error about "dsound.dll:ll" when I run PoG for Windows
Updating to version 8 or later of Direct X from Microsoft should take care of the problem. Go here for the update.
The Trinity plug-in doesn't load
There are a few possible reasons as to why the Trinity plug-in will not load:
- Trinity was installed from an Ambrosia CD: If you ordered a CD from Ambrosia Software Inc., there was a problem with the CD in that the Trinity folder has no data in it. You will need to download a new copy of Trinity in order to use it. You can get the Trinity plug-in here.
- Trinity files are incomplete or corrupt: Sometimes when downloading a file the browser or ftp program that is being used will quit prematurely and thus not download the entire file. Check the size of the trinity_plugin.sit file, it should be 15.0 MB, and the Trinity Plugin Folder which should be 15.8 MB. If either the stuffit file or the unstuffed file is not the correct size then redownload Trinity and install it.
- Trinity plug-in was installed incorrectly: When you unstuff the file "trinity_plugin.sit" it will create a folder named "Trinity Plugin Folder" that is 15.8 MB in size. Inside this folder is another folder named "(x) Trinity Plugin" which is 15.7 MB in size. Take the "(x) Trinity Plugin" folder out of the "Trinity Plugin Folder" and place the "(x) Trinity Plugin" folder into the PoG Plugins directory.
Trinity loads, but there are no people in the new locations
This is a problem when Mac users are using Trinity with an older version of PoG. Update to the latest version of PoG(currently v1.0.2). For Macintosh go here to get the update, and Windows users can get the update here.
I have a dual processor and PoG crashes or has other problems
This was a problem with the original release of PoG that was not fixed with the 1.0.1 update. However this problem has been addressed with the 1.0.2 update. Download and install this update and this problem should go away. You can get the update here.
PoG won't save my game under OS X Jaguar
This is a known issue. The short of it is that Apple changed things enough with the release of Jaguar that the save game code is incompatible with the current version of PoG. This problem should be addressed in the next update of PoG. In the meantime there is a solution. Basically you will create a text file called "anynameyouwanttogiveit.pog" The file can be named anything as long as it has the .pog extension. Then when you are within PoG and you click "save" you will want to browse to this file and select it. The problem with Jaguar is in it that PoG is unable to create a new file to save the game to, but if a file exists then it can overwrite that file to save your game. The only catch is the saved game file can't be opened with the Load option. You have to either double click the Saved game file, or drag and drop it onto the application.
Links to other PoG pages:
Below is a list of links to other PoG related web pages.Rubber Ducky's PoG Sectional Map: A very nice map that is printable, showing all the areas within PoG both above ground and below.
The Interactive, On-line PoG Map: A web page that has the PoG map broken down into clickable sections that you can browse via the web.
Upcoming Plug-ins Directory: A web page devoted to PoG plug-ins that are in development. This page details what the plug-in is, what it will add, and allows for developers to post progress logs of their work.
Walkthrough and Compendium Copyright ©2002 by Mike Zeman