A Scent Of Peril
Ferazel's Wand hides many secrets in the labyrinth levels. You can climb walls, dig holes with your Spin Jump, swim in lakes, and use magic spells to find secrets. All of this means that you have to keep a sharp eye out to find the secret passages that are present in every level. This guide will show you the hidden secrets in each level with directions and pictures so that you'll be sure to locate them. What I mean by hidden secrets is that I'll describe every secret that you requires breaking a wall or going to a hard-to-find location. If a chest or key is out in the open or easy to find, I won't include it here. If you have any comments or problems with this guide, you can email me. I welcome all criticisms, good and bad. There are just three secrets in the first level, but finding them teaches you about what secrets look like and how to find them in later levels when they are better hidden.
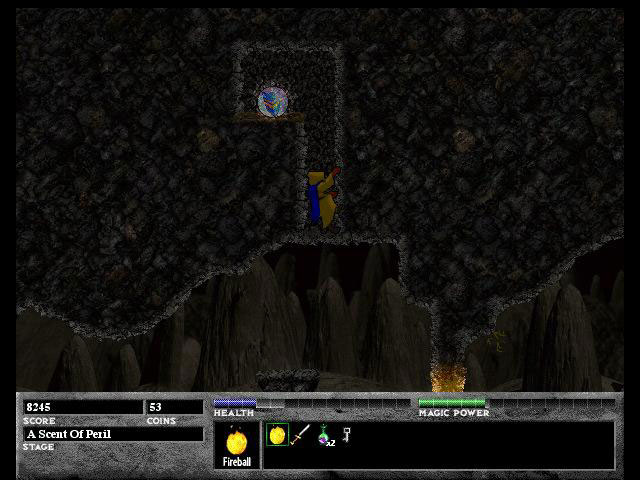
 Before
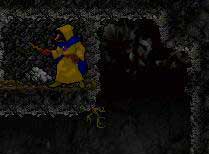
I start, I want to bring to your attention the importance of the rock
mounds that you will see in the caverns. In the screenshot to the left,
you will see the kind of rock that you can blast with your fireball to
get a health or magic crystal. I got to this ledge by climbing on the
wall in the right of the same screenshot. You should watch for walls like
this because they are the only ones you can climb. If a wall is slanted
then you can't climb it; it has to be perfectly vertical. To get from
the wall to the ledge, I held left on my controller and then I jumped
to make me jump to the left. You can jump and then move the controller
left but I find my method more accurate.
Before
I start, I want to bring to your attention the importance of the rock
mounds that you will see in the caverns. In the screenshot to the left,
you will see the kind of rock that you can blast with your fireball to
get a health or magic crystal. I got to this ledge by climbing on the
wall in the right of the same screenshot. You should watch for walls like
this because they are the only ones you can climb. If a wall is slanted
then you can't climb it; it has to be perfectly vertical. To get from
the wall to the ledge, I held left on my controller and then I jumped
to make me jump to the left. You can jump and then move the controller
left but I find my method more accurate.
![]()
 |
 |
| Picture 1 | Picture 2 |
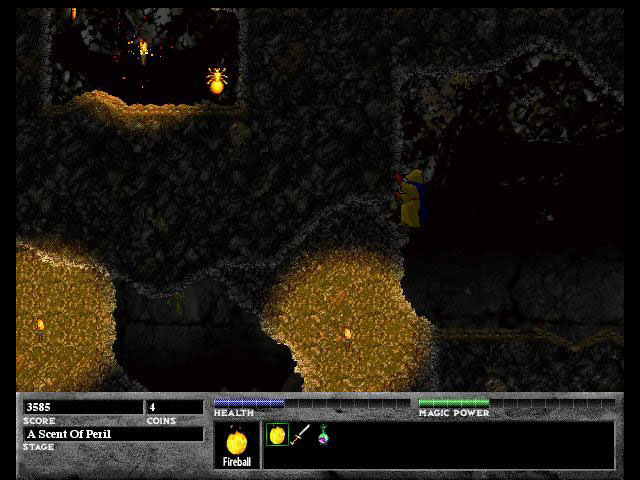
The first secret involves using your fireball to blast away at cavern walls to get to the goodies beyond. You find this secret by going right from the starting point until you come to the area shown by Picture 1. This area is right after the first body of water and isn't very far from the entrance so you will see it in a few moments. You then have to use your fireball to destroy some of the wall, but doing so requires a bit of dexterity because when you're clinging to a wall, you fire away from it. What you do is press the jump button and while in the air press the fire button and the fireball will (hopefully) hit the right spot on the wall and destroy it. Do this a couple more times and you are able to walk in and grab the stuff, just don't leave yet. Use your fireball on the left wall of the secret area to destroy more of the rock to make a tunnel that leads to a chest with gold coins as you can see in Picture 2. These are worth more than the silver coins that enemies sometimes give once you kill them.
![]()
 |
 |
| Picture 3 | Picture 4 |
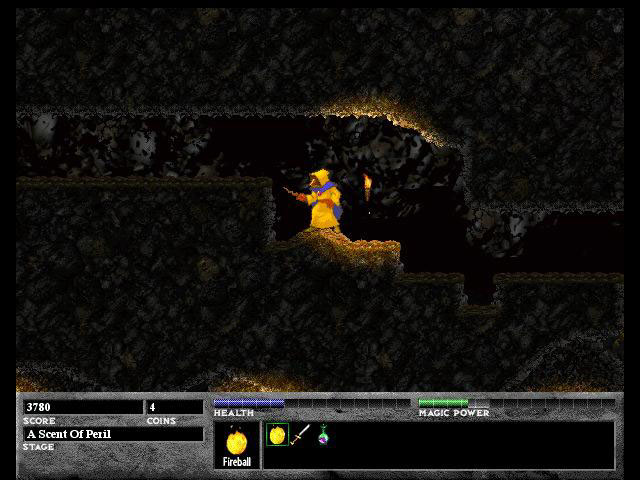
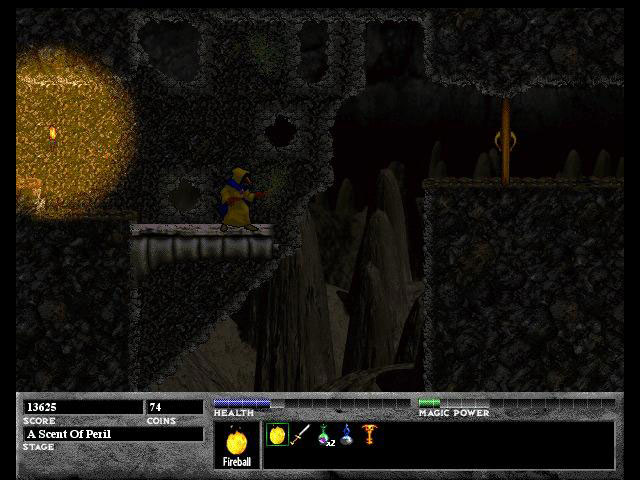
This secret is in the bottom level by going from the bottom level and then heading left until you come across Picture 3. You have to jump on the floating platform over the spikes and then jump straight up from there and cling to the wall to climb up and get the magic shield as you can see in Picture 4. This is the same shield that you probably saw below the lake when you were on the top level. What the magic shield does is make you invincible for a few seconds. You can walk on spikes, enemies can't hurt you, and you do a neat flip when you jump.
![]()
 |
 |
| Picture 5 | Picture 6 |
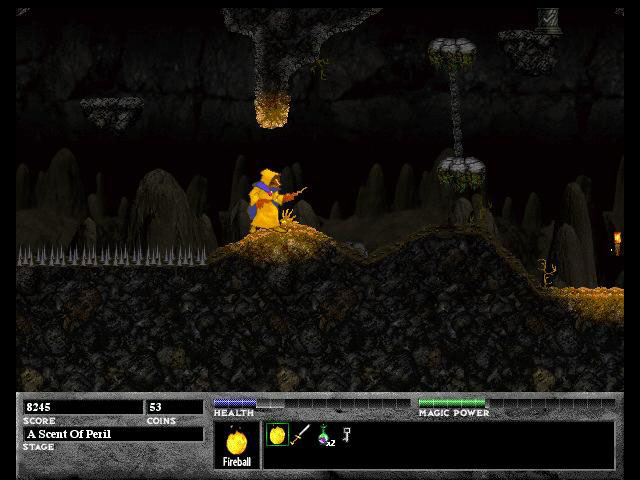
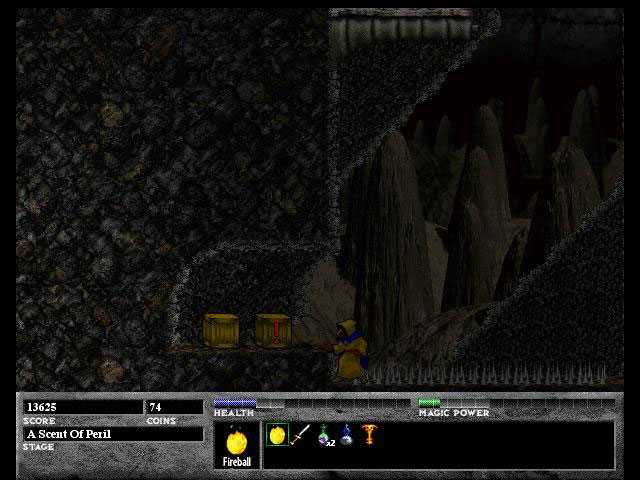
The last secret is just before the exit to the level called Cavernous Cavern. In Picture 5, you see Ferazel on a ledge facing the wooden exit door. What you have to do is climb down the pit to see metal spikes at the bottom. You then have to get to the left of the pit to get to the two wooden boxes. You will probably land on the spikes which will take a full notch from your health so make sure you are healthy or have a health potion handy. You can buy a health potion from the mysterious seller that can be found on this level. The wooden box with the exclamation box will explode when you use your fireball on it so I recommend that you shoot it from Ferazel's position in Picture 6. The left wooden box contains a sack of gold that will certainly come in handy when you move on to later levels. If you follow these directions and be sure to explore every area, you will get a 100% score just as I did.