How To Build A Better Sound System
by Matt Burch
Whenever I talk to the boss on the phone I'm always amazed at the sounds I hear. It's not Andrew's mellifluous voice that enthralls me, mind you, it's the sounds of his immensely powerful speakers in the background by which I'm so impressed. While nobody seems quite sure just what kind of speakers he has hooked up to his Mac, it's safe to say that they: A) are made by Bose, B) are expensive as heck, and C) sound amazing - they'd probably put a Disaster Area concert to shame.
Anyway, the point is that up until recently I was insanely jealous of Andrew's sound system. I had been getting by with a tiny pair of amplified speakers that came with my first ever single-spin CD-ROM drive. Just for fun, I cracked these open one day and went poking around with my digital multimeter; to my surprise, I found that these so-called "amplified" speakers had almost no amplification built into them at all - just barely enough to drive the speakers, without providing any of the extra "oomph" that's needed to provide truly great sound. I did a little research and found that there are other companies which advertise more expensive "multimedia" speakers that are supposed to have sound quality superior to the cheesy little ones that come with many computers. However, after listening to a few of them I discovered that, while they may be advertised as serious, professional, high-quality sound systems, they still sound like computer speakers. What's worse, a pair of these things could cost up to $200.
"Hey, you're a handy guy," a little voice said to me, "Why don't you just build your own speaker system?" After checking under the desk to see if I could locate any little voices, I agreed, and set to work. One quick trip to Radio Shack and a half-hour of work later, I had constructed myself a really nice sound system, with plenty of power and great sound quality. In this article I'll make some sort of attempt at showing you how you, too, can build yourself a sound system for your computer, using nothing but off-the-shelf parts and a little bit of know-how.
A couple of notes: While serious audiophiles may have started laughing when I mentioned Radio Shack in the above paragraph, I assure that unless you're a truly dedicated purist, you'll agree with my evaluation of the Radio Shack hardware. The equipment I used for my sound system was selected for its quality, durability, and economy; I shopped around and found that Radio Shack could offer me all three, while the local appliance superstores, such as Best Buy, just wanted to sell me an expensive stereo system which was unsuitable for my needs. (For the record, I'm also not affiliated with Radio Shack, except as a satisfied customer.)
There - with that out of the way, let's get to work building your new sound system, shall we?
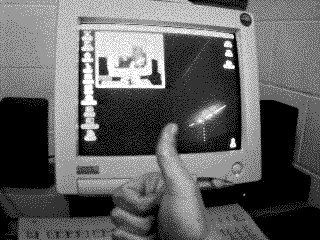
Figure 1: Matt's sound system in its native environment. That's a 17-inch monitor, by the way, so the speakers are actually somewhat bigger than they appear. The amplifier is the dark object under the right-hand speaker.
Getting The Goods
The first thing you'll need to do is figure out exactly what you want to buy. If you stick with my recommended amplifier and speakers, this is basically a matter of determining which cables you'll need. If the only thing you want to hook to your new sound system is your computer, then you don't need to buy anything besides what's in the table below:

Table 1: What you'll need to buy for the basic setup.
(If you also want to hook your amp to something else, you'll need additional cabling. In my case, I wanted to hook my external CD-ROM drive into my sound system. Both the CD-ROM drive and the amplifier have phono jacks, so all I needed was a dual phono-phono cable, and I was in business. If your situation isn't as clear-cut as this, advise you to experiment until you get something that works.)
Becoming A Stripper
Okay, you've been to the store, and now you're back with an armload of stuff and are $150 poorer. Now it's time to build your sound system. We might as well get the hardest step - the one that involves the use of knives and the permanent disfigurement of your new purchases - over with first.
Oh, didn't I tell you? We're going to put your new toys under the knife. Relax, it's not as bad as it sounds - certainly not as difficult as the brain transplant Andrew got a year ago. All we're going to do is cut that 12-foot length of speaker cable in half and strip some of the insulation off the ends. Experienced technoweenies can do this for themselves; for everybody else, just look at the pictures and follow along:
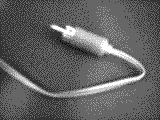
Figure 2: The speaker cable is the one with a plug like this on either end.

Figure 3: Fold the cable in half, so that the two plugs are even, and cut the resulting loop of wire in the middle so you have two pieces of wire of equal length, each with a plug at one end and a bleeding stump of severed cable at the other. Here I'm using my trusty Swiss army knife for this gruesome task. (cool Apple shirt, eh?)

Figure 4: Each length of cable is made up of two insulated wires glued together. Pull the ends of each cable apart so you have two short lengths of wire to work with - about an inch or two of wire is plenty.

Figure 5: This indistinct picture is supposed to show you the results of the hardest part of this process, the Stripping Of The Wires. With a scissors or other two-bladed cutting implement - I used the scissors in my knife again - gently squeeze one of the wires about a half-inch back from its end. The idea here is to cut through the insulation, but not the copper strands inside. Don't worry if you accidentally cut too far; just lop off your mistake and try again. You've got a whole six feet of wire to work with, after all! When you've made your cut successfully, pull off the little piece of insulation at the end to reveal the copper strands. (fingernails help here) Repeat for the other three wire ends.
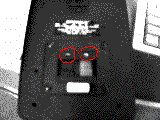
Figure 6: Turn over one of your speakers and locate the two holes I've circled above - they should be partially covered by those red and black plastic sliding things. Usually red and black mean positive and negative, but in this case it shouldn't make any difference. While holding down on the plastic sliding thing of your choice, insert one of your bare wire ends into the resulting hole. Let up on the plastic sliding thing, and your wire should now be firmly held by the speaker. Insert the other wire end on the same cable into the other hole, and repeat for the other speaker.
Finishing Touches
Congratulations! If you've managed to progress this far without needing professional medical treatment, then for Pete's sake, put the knife away! You won't be doing anything other than plugging in cables from here on out.
All you have to do now is put the correct plugs into the correct sockets. Into your computer's sound-out jack, insert one end of the stereo-to-phono adapter cable. Stick the two plugs on the other end into the sockets marked "Tuner" on the amplifier. If you've got another device to attach, plug it in to the amp's "CD/Tape" input; the "Phono" input won't work. Then plug the speakers' plugs into the amp's "Speaker L" and "Speaker R" jacks, plug the amp into a handy power outlet, and you're all set!
Before trying to make any noise, make sure the Power button is pressed in, the Mono button is not pressed in, and the volume knob is set to 30% or less. Also, make sure your speakers are mounted in a stable fashion - those suckers are heavy! Then go wild with your favorite games and music CDs. I'll wait.
Dum de dum de dum... oh you're back. So did it sound good? Excellent, I'm glad. One thing I changed about my setups once I'd had it for a few days was the amp's volume knob: that little notch is hard to see against the black plastic that the knob is made of, so I made it show up a little better with some strategically-placed white-out applied with a toothpick.
I hope you've had fun building your new sound system - you should get many years of improved sound out of it. In the meantime, I have to get back to work... I've spent far too much time just listening to music instead of writing code!
Ed Note: Matt Burch is currently putting the finishing touches on Ambrosia's forthcoming game Escape Velocity. When he's not slaving away at the byte factory, Matt can be found studying engineering at the University of Kansas. How he manages to do all this and get any sleep is beyond us.


